How to create brass gallery rails for a fraction of the cost!!!
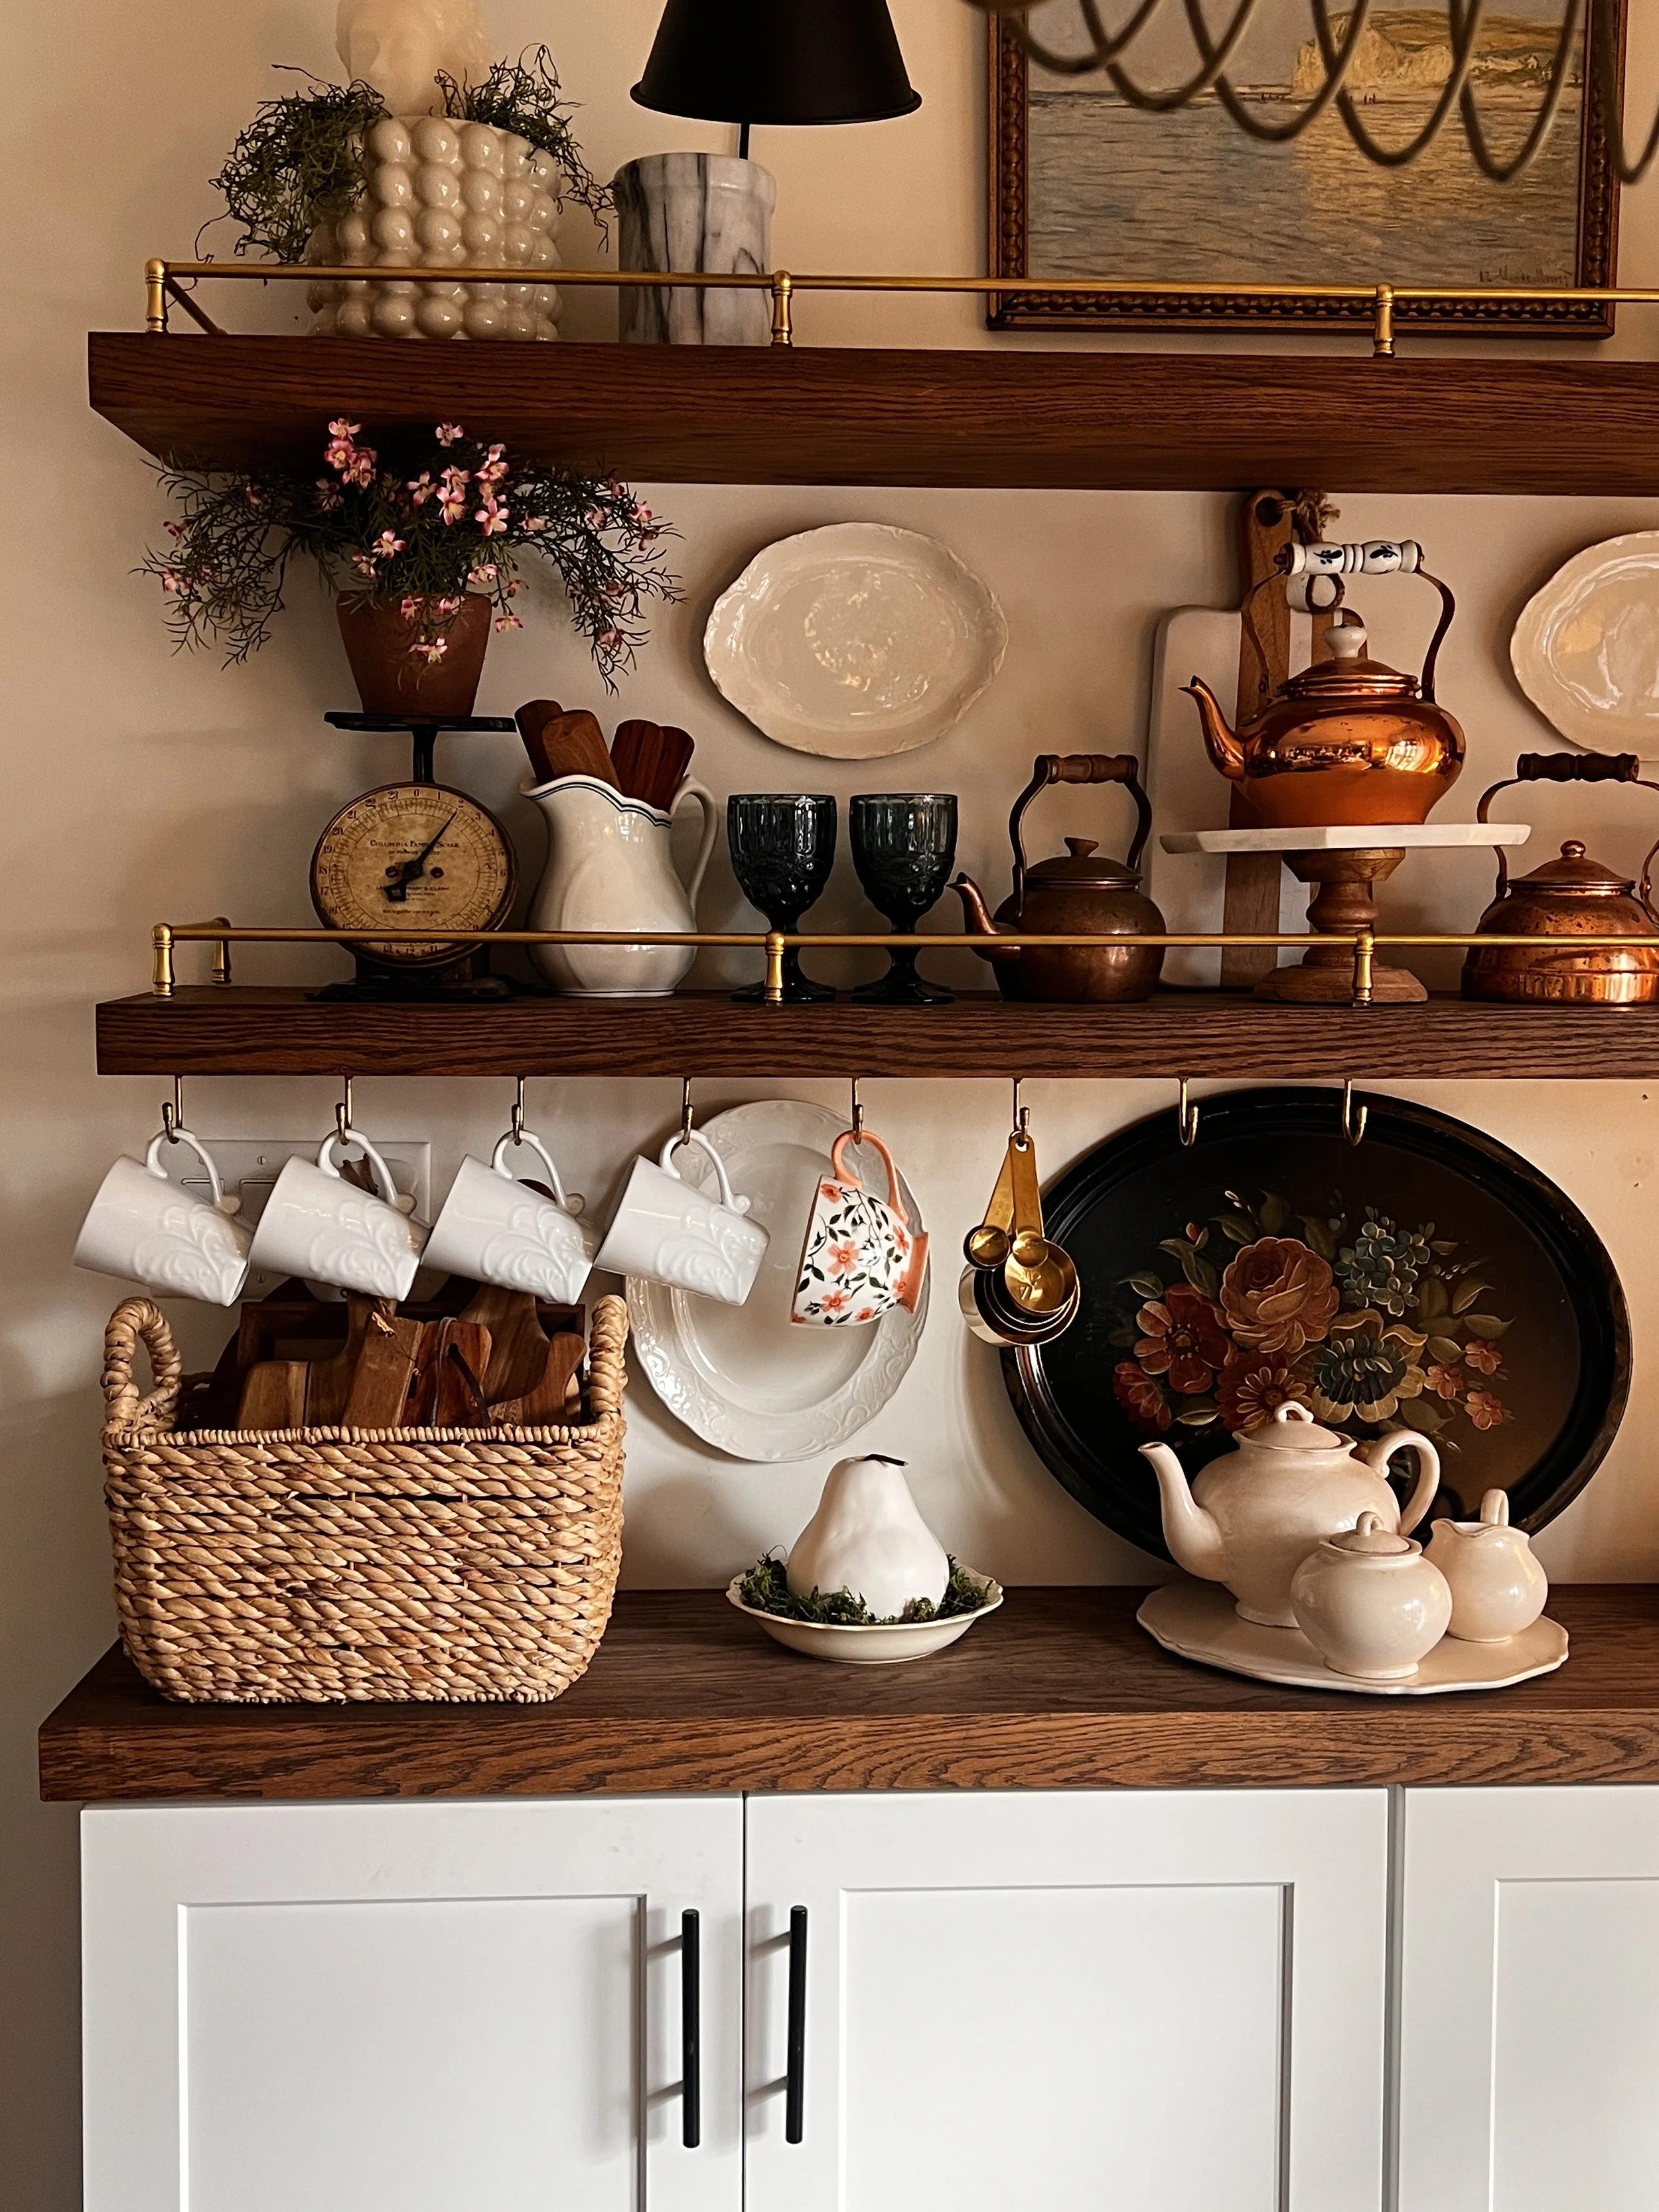
The final product!
DIY Brass Shelf Rails – You Won’t Believe What I Used!
I have been obsessing over the look of brass gallery rails on shelves, but when I started pricing them out—WOW. The cost was way more than I was willing to spend. That’s when my husband (who is super handy) and I started brainstorming ways to achieve the same elegant look for a fraction of the price.
And guess what? We made it happen for 1/3 of the cost using… brass lamp parts! Yes, you heard that right—lamp parts! We ordered them from Grand Brass Lamp Parts.
This is all it took to create such a beautiful finishing touch to the shelves!
How We Did It
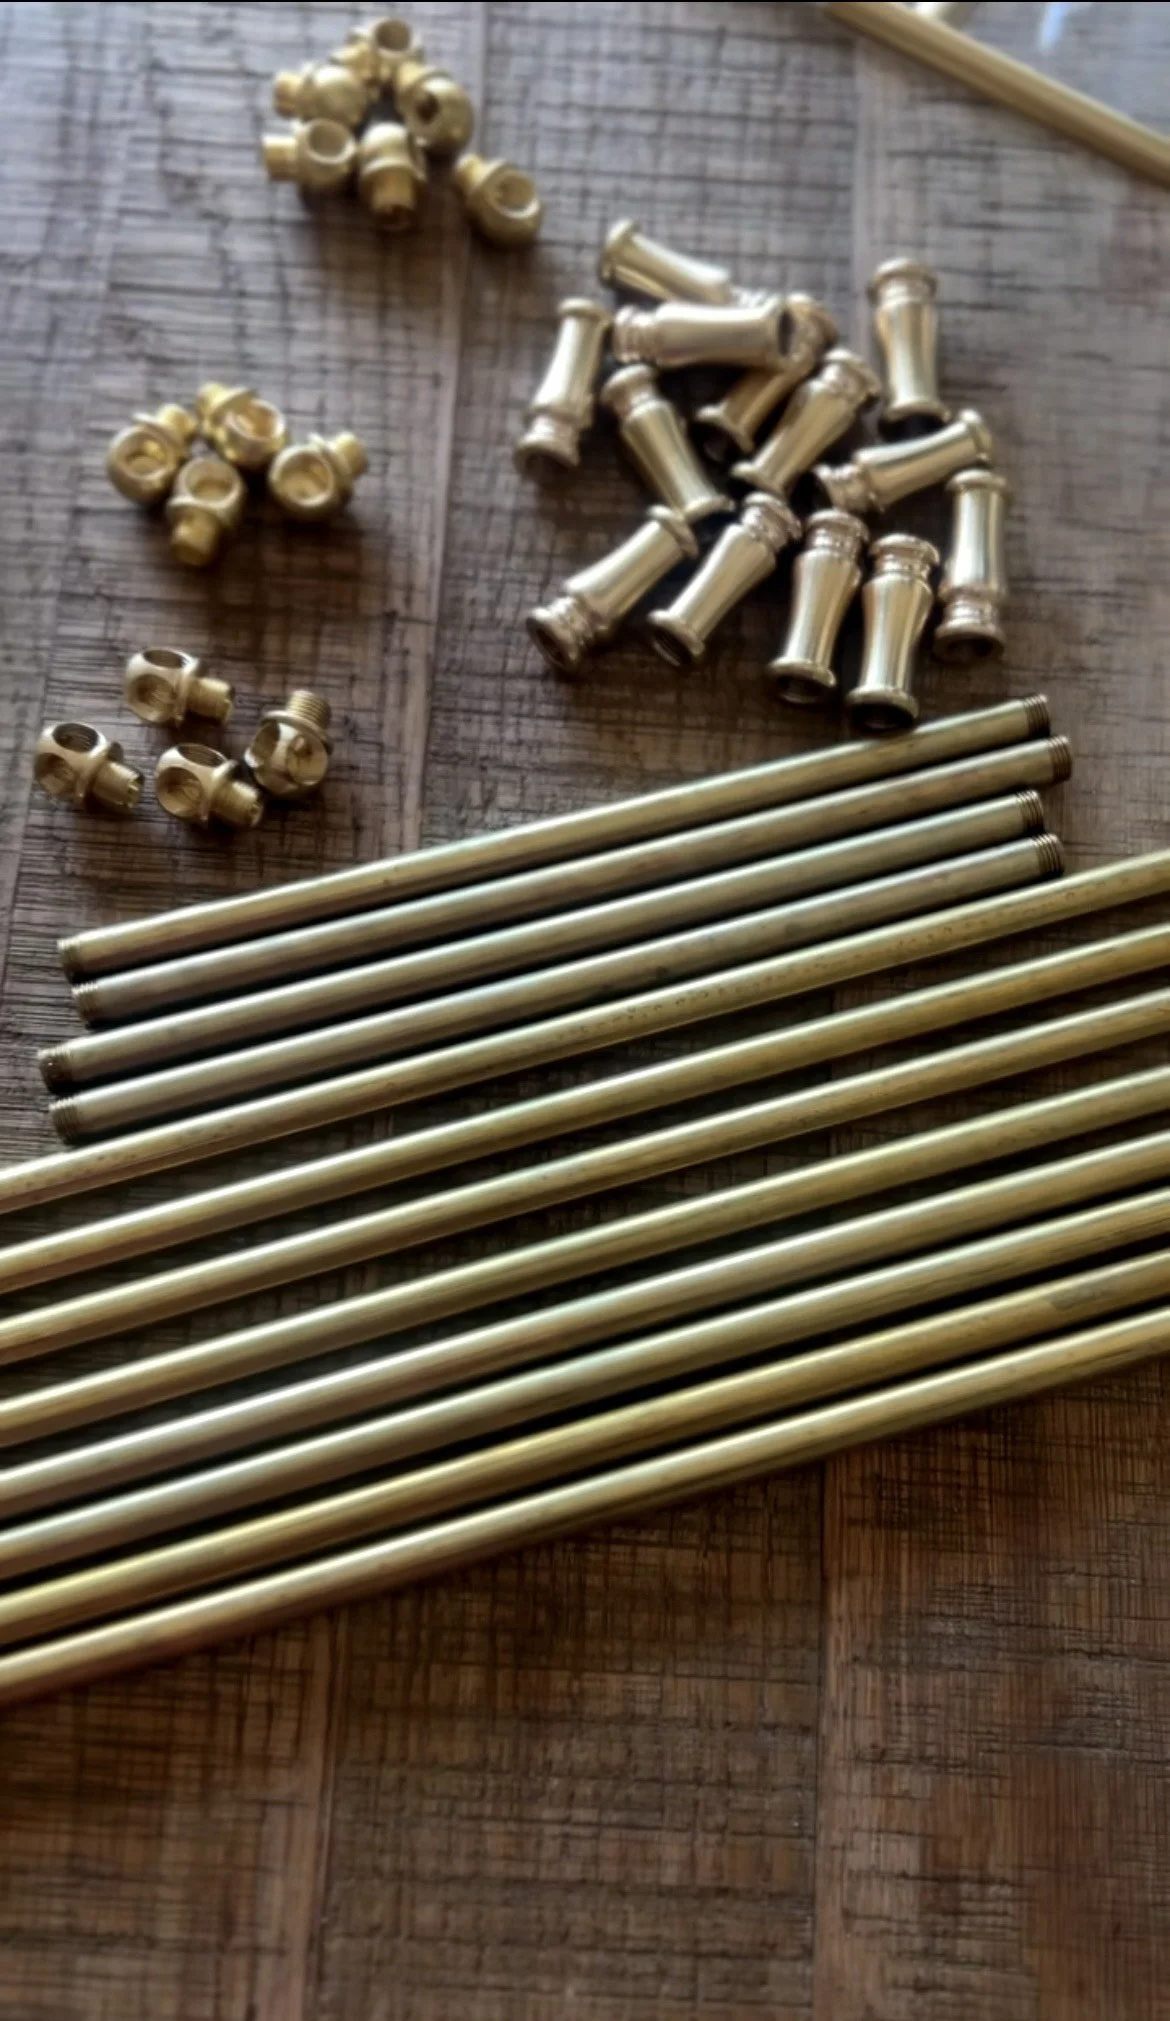
We measured out the length of our shelves and determined how many center and end pieces we would need to create the perfect custom look. Once we had our measurements, we ordered the necessary brass lamp pieces, and they arrived quickly!
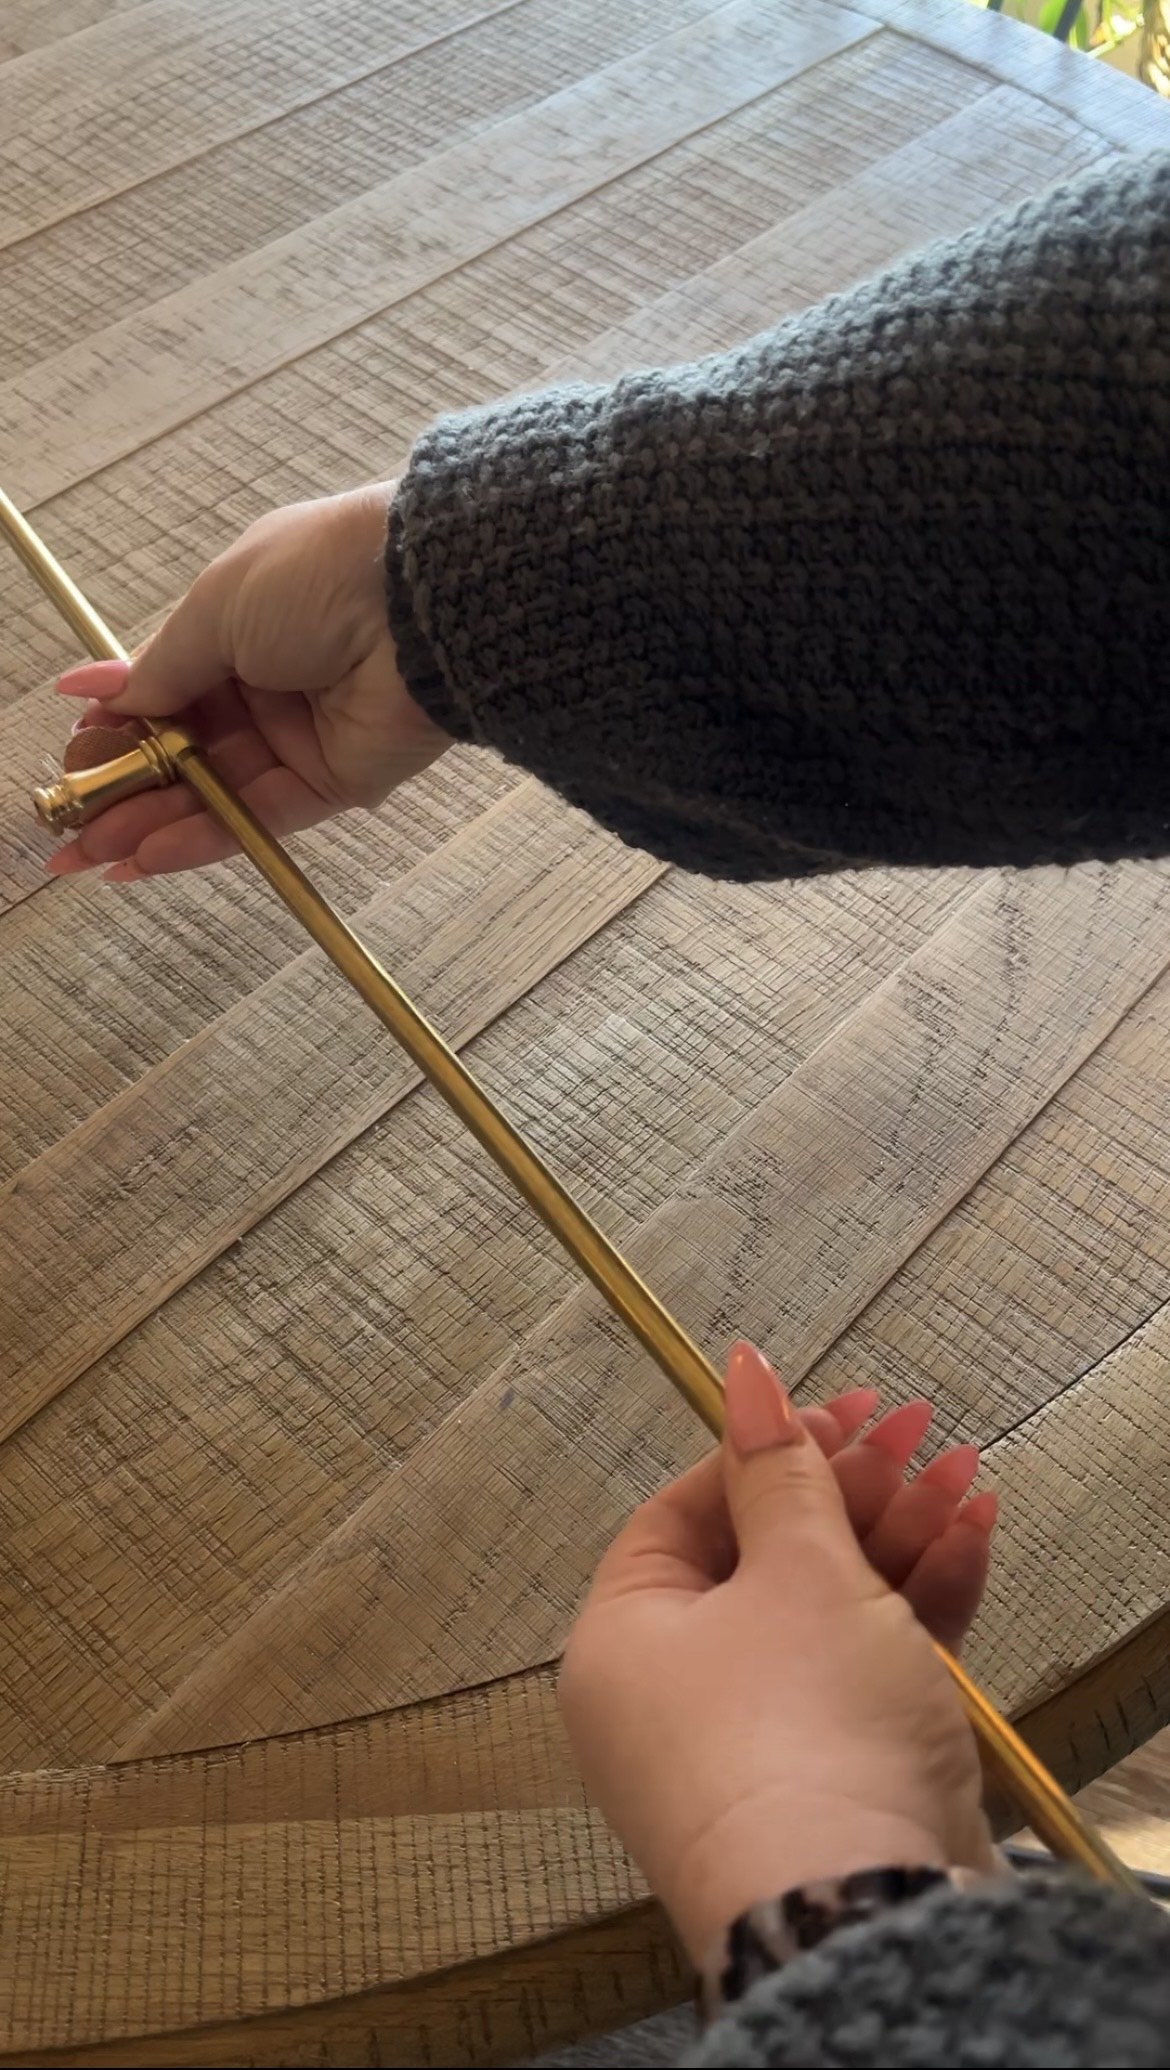
So simple to screw the rails together and attach corner pieces and connectors.
Materials List:
Brass lamp rod (they sell various lengths)
Brass end finials (for a polished look)
Brass connectors (to attach sections seamlessly)
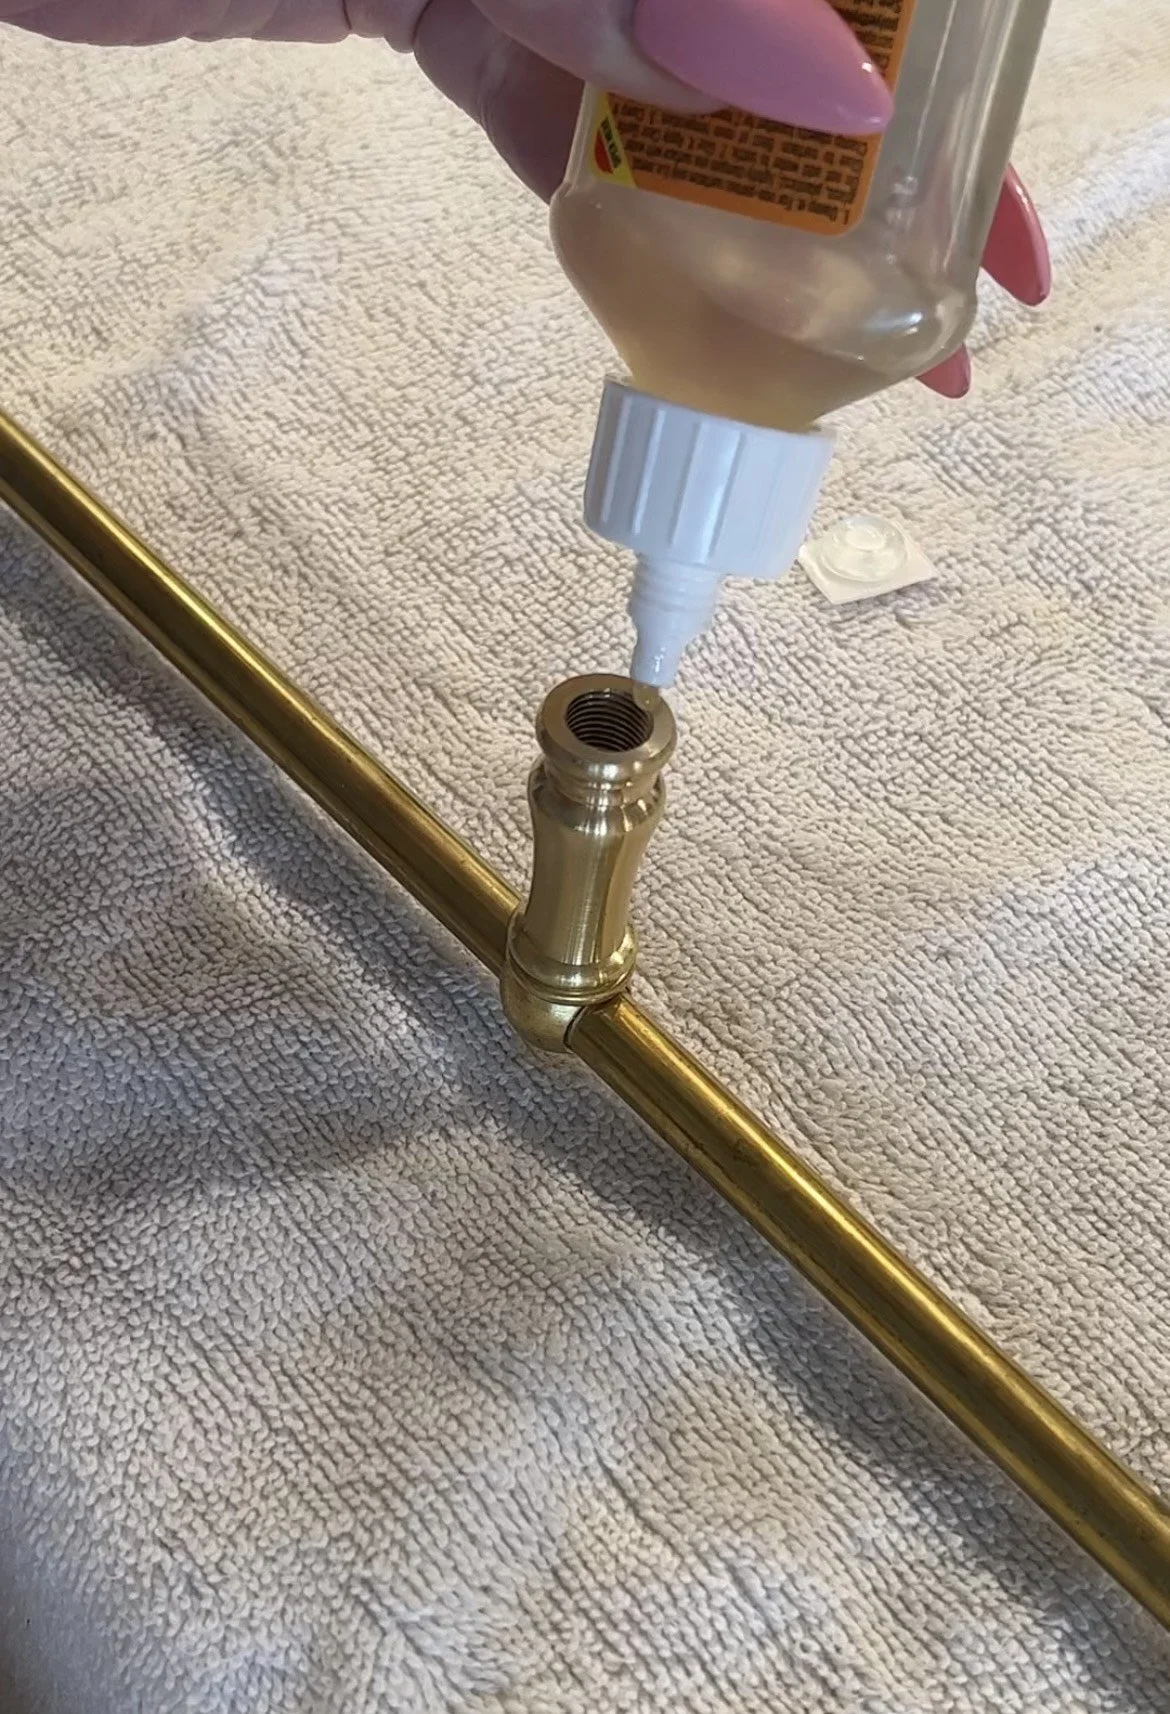
Clear cabinet bumpers (for a non-permanent attachment)
I glued on the clear cabinet bumpers and used the sticky side to attach the rails to the shelves without drilling.
Assembly Process:
Screw the pieces together – The rods easily connected to the end finials and center connectors.
Attach the rails to the shelves – Instead of drilling (because I wanted this to be non-permanent), we applied clear cabinet bumpers to the bottom of the corner and centerpieces. The sticky backing helped them stay put!
Style & Enjoy! – These rails have been up for over a month, and I’ve restyled my shelves multiple times with no issues at all!
Why I Love This DIY
Budget-Friendly – A high-end look without the high-end price tag.
Easy to Assemble – No power tools required!
Completely Custom – You can adjust the length and height to fit your exact space.
Non-Permanent – Perfect for renters or anyone who likes to switch things up.
I’m absolutely thrilled with how this project turned out! If you’ve been eyeing brass gallery rails but don’t want to break the bank, give this hack a try. You might just surprise yourself with how luxe it looks!
Let me know if you try this DIY or if you have any other creative hacks for getting the look for less!
Click here to watch my Instagram reel of the final product, I am so in love!


